

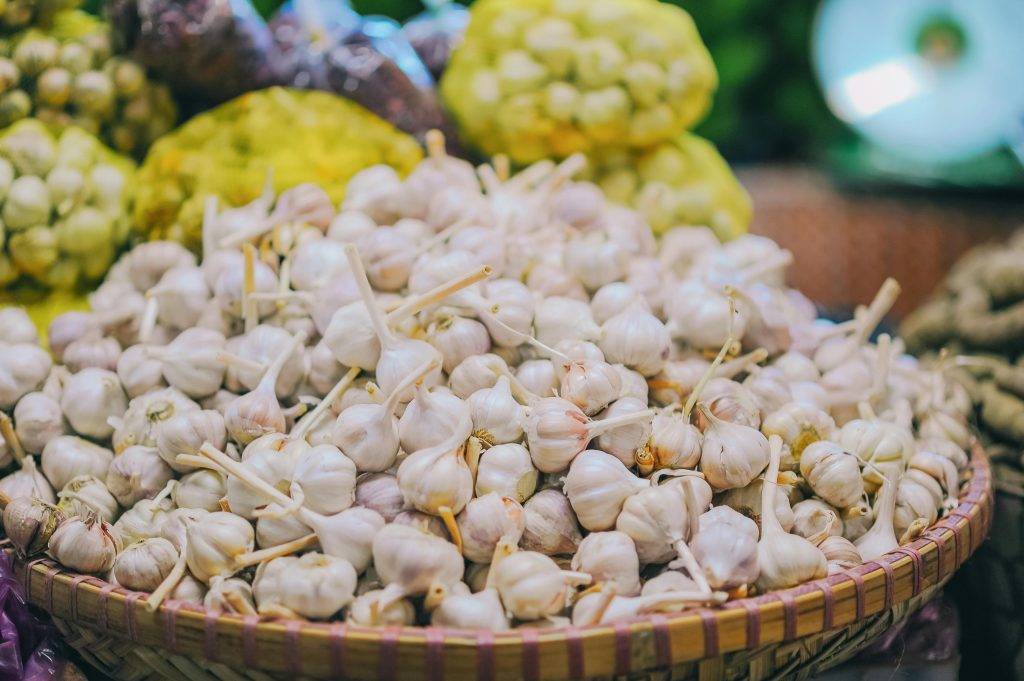
Growing garlic in your garden is wonderfully satisfying. From just one clove put in the ground in the fall, you get a whole bulb by next summer and don’t have to do a lot to it while it grows. However, lots of gardeners get rather small bulbs, heads which are too small and have thin cloves that really don’t make the long wait worthwhile. Usually, what separates so-so garlic from spectacularly large, full bulbs is a few choices about how you plant and how you look after it in the first few weeks of springtime when it is actively growing.
Choosing the Right Garlic for the Climate
Generally, garlic comes in two main kinds: hardneck and softneck. Hardneck garlic grows a firm, upright stem (this stem is called a scape), has fewer, though bigger, cloves in each bulb, and needs a cold winter to grow as it should, which is why people in gardening zones 1 to 7 often choose it. Softneck garlic doesn’t make scapes, has lots of little cloves, will keep for a longer time after you’ve dug it up, and can handle warmer winters. Consequently, it’s a better bet for zones 7 to 10. Garlic often doesn’t grow well because of being given the incorrect kind for where you live. What’s good to know is that garden shops in warmer areas will usually only sell softneck types, and seed companies in the north mostly have hardneck, so a lot of the choosing for you has been done.
When and How to Plant for Maximum Bulb Size
For the best results, put garlic in the ground in the fall, about a month and a half before the ground is likely to freeze. This gives the individual parts of the bulb a chance to grow roots before the plant goes to sleep for the winter, and that gives it a big advantage when it starts growing again in the spring. When you plant each clove, the pointy side should be facing upwards, and it should go two or three inches into the soil with four to six inches between each one. How deep you plant them is important; if they aren’t deep enough, they can be pushed out of the ground as the temperature goes up and down during freezing and thawing, but if they’re too deep, the plant uses up energy just getting through all the extra dirt. After you’ve planted them, put on a nice thick layer of straw or broken-down leaves, around four to six inches deep. This protects the soil, keeps the temperature more even, and stops weeds from growing next spring.
The Spring Care That Makes the Biggest Difference
Garlic really likes to eat, and it’s helped by getting extra nitrogen while it grows quickly in the spring. When you see the first green tops pushing up in early spring, and then again three or four weeks after that, give it a boost with composted manure, blood meal, or a general organic plant food. This is how you get it the good stuff it needs for lots of healthy leaf development. Actually, for every leaf the garlic plant makes, the bulb will have one layer of covering, so more leaves usually means a bigger bulb when you harvest, and one that’s better protected. Watering regularly in the spring is just as crucial. Garlic does best with around an inch of water a week when it’s actively growing, but it’s no good for the roots to be sitting in overly soggy soil.
Why Removing Scapes Increases Bulb Size
In late spring, hardneck garlic grows a curved flower stem, this stem is called a scape. If you let the scape stay on the plant, it sends the plant’s energy into growing tiny little garlic seeds at the end of it, and that means the garlic bulb underground won’t get as big. Agricultural colleges have shown that taking the scape off when it’s fully curled, but hasn’t yet straightened out, can make the bulbs ten to fifteen percent heavier. Plus, the scapes you’ve taken off are a lovely thing to eat, having a subtle garlic taste, so you get something nice from getting rid of them!
Harvesting and Curing for Best Results
You can harvest garlic in the middle or later part of summer, depending on where you are, when the lowest three or four leaves have browned, but the rest of the plant is still green. If you dig it up too soon, you will get little garlic bulbs that haven’t finished growing. But if you leave it in the ground for much too long, the outer layers will fall open and rot, and you won’t be able to keep it good for very long. Once you’ve taken the garlic from the earth, it needs to dry or “cure” in a place that’s warm, dry and has plenty of air circulating for between two and four weeks. Good curing means those outer layers dry all the way through, locking in the water and flavour. Hardneck garlic that has been properly dried will be good for four to six months, and softneck garlic can stay good for eight months, or even longer.
Key Takeaway
To reliably get really big garlic, you need to pick a kind that suits where you live, put it in the ground in fall at the proper depth and cover it with a generous layer of mulch. Early in spring, the plants will benefit from extra nitrogen, and if you’re growing hardneck garlic, you should snip off the scapes. And, you’ve got to dig them up when they are ready. Each of these things builds on the previous one, so if you don’t do even one, you’ll get much smaller bulbs at harvest.
Leave a Reply